Japanese Knotweed Mesh Control Experiment

In June of 2020, the Vermont Land Trust embarked on an experiment to see if wire mesh placed over a patch of knotweed could control this nasty invasive plant. The project has been surprising in a number of ways and we have learned some things that we think may be helpful to others contemplating using this control method.
So why mesh?
The mesh method has gained quite a bit of attention, and is apparently widely used in Europe. The setup is simple. All you need to do is place a wire mesh over a patch of knotweed and let the plants grow up into it. As the stalks grow up through the mesh and increase in diameter, they are girdled by the mesh. At least, that is the theory.
Perhaps the first thing you should know about this method, and controlling knotweed in general, is that it does no good to treat a portion of a patch of knotweed. Because the rhizomes of the plant are so extensive and intertwined, if you control some of a patch, the remaining plants will quickly send out shoots to recolonize the area. As such, if you are going to try this, make sure you are dealing with a distinct and manageable patch.
Experimental Area
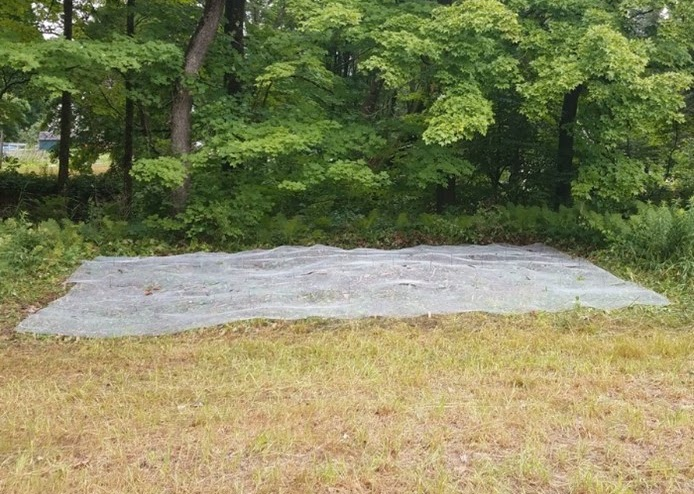
Our chosen knotweed patch is approximately 16 feet by 20 feet. Since knotweed is capable of sending out lateral shoots, we extended the mesh four feet beyond the edge of the patch, which is a little less than the recommended 6-foot extension.


To get the mesh in place, we needed to clear the existing shoots. Because our mesh was placed in late-June, we were cutting relatively mature knotweed.

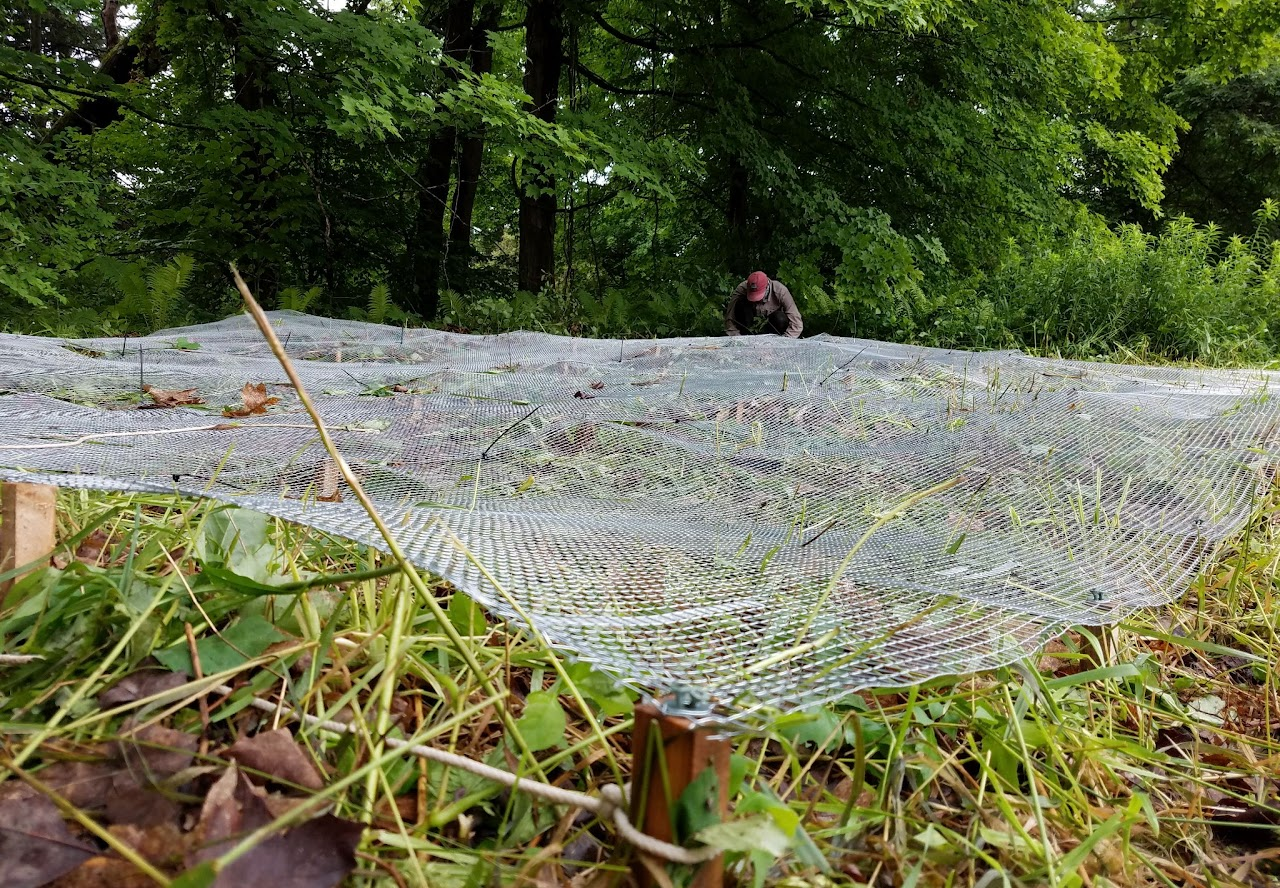
We chose a mesh (hardware cloth) that had ½” square holes. The mesh needs to be suspended a few inches above the ground. If placed directly on the ground, the plants will put more energy into extending lateral shoots. We placed ours on foot-long, 1-inch square wooden stakes spaced two feet apart and driven into the ground about 8-9 inches. The mesh was secured to the stakes using square drive screws and washers.
Results
- By week 2, some shoots had grown to fill the ½” holes.
- By late-August many shoots had grown to full maturity and were flowering.

- At week 11 (the middle of September) we saw the first shoots fall over as a result of having been girdled.

Take-Aways
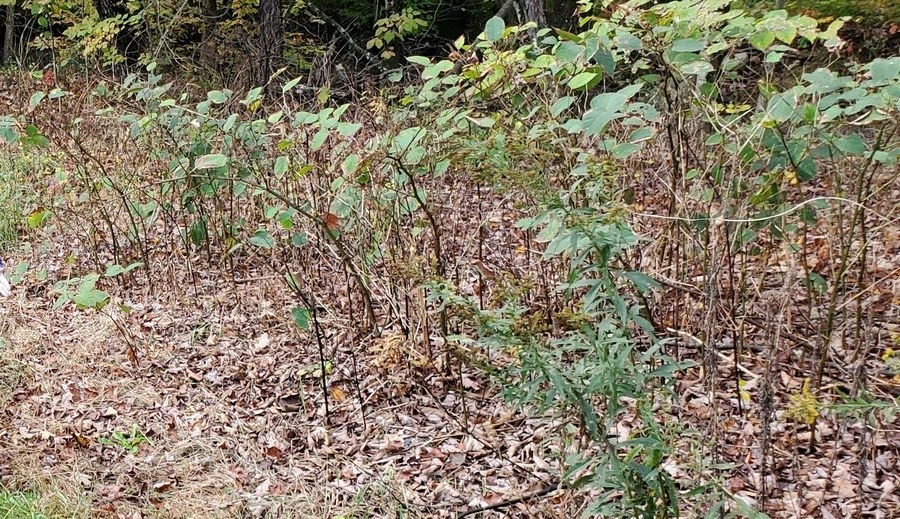
All in all, it is safe to say we were a bit disappointed by the results of year one. Overall, regrowth was not as vigorous as we had thought it would be. This may be because we cut it after it had put a lot of energy into early season shoot and leaf growth. Very few plants grew to a diameter big enough to be girdled and many of them flowered and set seed. It seemed we had made very little progress.
This was a year of benign neglect and observation for the knotweed mesh experimental plot. We did next to nothing to maintain it and just sat back and watched what happened. We were expecting plants to grow into the mesh more quickly and, we hoped, to be girdled before reaching the flowering stage in August.
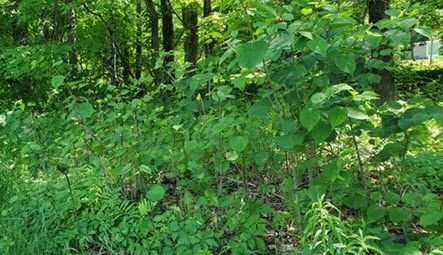
One of the first things we noticed was the woodbine, also known as Virginia creeper, was growing pretty out of control and covering some areas on the mesh and pulling others down. The second thing we noticed was that there weren’t many knotweed shoots coming up. Many fewer shoots occupied the plot than when we started. This is pretty obvious if you compare the initial photo, above, with the photo of June 2021. Native plants, such as goldenrods and ferns, were more plentiful in the plot. In late-July, we had a professional invasive plant control company come in and do an extensive, targeted chemical control application to numerous invasive plant species on many parts of the property. Unfortunately, the knotweed in the experimental plot was treated, as well. However, living up to its reputation as extremely difficult to kill, the knotweed laughed off the chemicals and continued to grow. Again this year, few canes grew large enough to be girdled by the ½” hardware cloth mesh.


Things to Do Differently
- We theorize that if we had put the mesh in place before the knotweed had emerged, we would have had more vigorous initial growth and better control in year one. If we try this again, we will definitely get the mesh down in April.
- Fairly large sections of the mesh were on the ground by year two. This was in part due to the twining tendrils of the woodbine vine. Regardless, if we were to do it again we would use shorter stakes and place them closer together to give the mesh more support. Another option might be to put down 2x4s on edge, but you run the risk of promoting more lateral shoot formation.
- Using screws and washers really locked the mesh down on the stakes. It might be easier and cheaper to use cable staples, although you would have to be careful not to knock the stakes in too close to the ground while pounding in the cable staples.
- The biggest change we would make is using a smaller mesh opening. If we give it another go, we will get some 1/4” hardware cloth.
Expenses
To help people get an idea of what this will cost, here is a list of our supplies. Bear in mind these are pre-pandemic (before 2020) broken supply chain prices.
| Hardware cloth – One 4’ by 100’ roll | $200 |
|---|---|
| 75 - 1”x3 ft. hardwood stakes | $102 |
| Misc. hardware | $59 |
| Total | $361 |
That works out to roughly $1.15 per square foot, without figuring in our labor. It took two of us about 5 hours to clear the site and place the mesh. If you had a 100 foot stretch along a river bank or road that was 6 feet wide, the supplies alone would cost you over $1500, in early 2020 dollars.
We have spent a fair amount of money and quite a bit of time on a tiny piece of ground. Because the goal all along was to gain experience and showcase the work, we are happy with the results. If we were trying to wipe out this little patch of knotweed, we would be a little less sanguine.
What will 2022 bring? Who knows, but we will be there to watch and encourage you to come by and have a look!
If you are interested, shoot us an email at sevtcisma@gmail.com